-
[스프링 5 레시피] 2장: 스프링 코어 (2-7 ~ 2-12)Spring 2021. 3. 4. 14:45반응형

2-7. 프로퍼티 파일에서 로케일마다 다른 다국어 메시지를 해석하기
IoC 컨테이너는 국제화(i18n)와 관련된 기능을 제공해 주는데요, 스프링에서는 리소스 번들 메시지를 처리하는 메서드가 정의되어있는 MessageSource 인터페이스를 사용할 수 있습니다.
메시지 properties 파일 작성하기

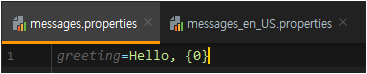
resources 디렉토리 아래에 message.properties를 여러 개 작성하면 인텔리제이에서 자동으로 'messages'라는 이름의 Resource Bundle 패키지로 묶어줍니다. 기본 파일인 messages.properties와 messages_en_US.properties는 greeting의 값을 영어로 작성하고 messages_ko_KR.properties는 한국어로 작성하겠습니다. 중괄호 안에 숫자는 애플리케이션에서 동적으로 값을 넣어 줄 배열의 인덱스입니다.

MessageSource 빈 등록하기
스프링에서 리소스 번들 메시지를 구분하여 처리하려면 MessageSource를 빈으로 등록해야 하는데요, 가장 많이 쓰는 구현체는 ResourceBundleMessageSource와 ReloadableResourceBundleMessageSource가 있습니다.
후자를 사용하면 properties의 내용이 변경되었을 때 애플리케이션을 다시 올리지 않아도 변경된 메시지를 동적으로 가져온다는 장점이 있습니다.
MessageSource 인스턴스를 생성하고 프로퍼티를 설정해서 빈을 등록 해주었는데요, 빈의 이름은 messageSource로 지정해야 스프링이 감지합니다.
@Configuration
public class MessageConfiguration {

    @Bean
    public ReloadableResourceBundleMessageSource messageSource() {
        ReloadableResourceBundleMessageSource messageSource = new ReloadableResourceBundleMessageSource();
        messageSource.setBasenames("classpath:messages");
        messageSource.setCacheSeconds(1); // properties 파일이 수정되었을 때만 다시 읽도록 설정
        return messageSource;
    }
}
스프링 부트 사용 시 messageSource를 자동 등록해주기 때문에 개발자는 빈 등록 없이 사용하면 됩니다.
애플리케이션 컨텍스트의 getMessage() 메서드로 메시지를 불러올 수 있는데요, 이 메서드의 첫 번째 인수는 메시지의 키이고, 두 번째는 메시지 매개변수 배열, 세 번째는 대상 로케일입니다.
public class Main {

    public static void main(String[] args) {
        ApplicationContext context = new AnnotationConfigApplicationContext(MessageConfiguration.class);
        // 임시적으로 Locale의 디폴트 값을 빈 값으로 설정하여 Locale 정보를 알 수 없도록함
        Locale.setDefault(Locale.ROOT);

	// Locale을 확인할 수 없을 땐 messages.properties를 로딩함
        String greeting = context.getMessage("greeting", new String[]{"min"}, Locale.getDefault());
        System.out.println("greeting = " + greeting);

        String greetingUS = context.getMessage("greeting", new String[]{"min"}, Locale.US);
        System.out.println("greeting = " + greetingUS);

        String greetingKO = context.getMessage("greeting", new String[]{"min"}, Locale.KOREA);
        System.out.println("greetingKO = " + greetingKO);
    }
}


--- 결과 ---
Loading properties [messages.properties]
greeting = Hello, min

Loading properties [messages_en_US.properties]
greeting = Hello, min

Loading properties [messages_ko_KR.properties]
greetingKO = 안녕, min
다음 코드는 ApplicationContext를 가져올 수 없는 상황에서 MessageSource를 생성자로 주입받아서 사용하는데요, getMessage() 메서드에 사용된 Locale.getDefault() 메서드는 JVM이 실행되는 호스트 시스템의 기본 설정에 의해 결정됩니다.
@Component
public class MessageSourceTester {

    private final MessageSource messageSource;

    public MessageSourceTester(MessageSource messageSource) {
        this.messageSource = messageSource;
    }

    public void printMessage() {
        String greeting = messageSource.getMessage("greeting", new String[]{"min"}, Locale.getDefault());

        System.out.println("greeting = " + greeting);
    }
}
위의 printMessage()를 호출하면 messages_ko_KR.properties 파일을 로드하는 것을 확인할 수 있습니다.
public class Main {

    public static void main(String[] args) {
        ApplicationContext context = new AnnotationConfigApplicationContext(MessageConfiguration.class);

        MessageSourceTester tester = context.getBean(MessageSourceTester.class);

        tester.printMessage();
    }
}

-- 결과 --
Loading properties [messages_ko_KR.properties]
greeting = 안녕, min
2-8. 애너테이션을 이용해 POJO 초기화/폐기 커스터마이징 하기
어떤 빈은 사용하기 전에 특정한 초기화 작업을 거쳐야 하는데요, 파일을 열거나, 네트워크 또는 DB에 접속하는 경우입니다. 이런 빈은 생명을 다하는 순간에 폐기 작업을 해주어야 합니다.
테스트하기 위해 Cashier 클래스를 구현하였습니다.
public class Cashier {

    @Setter
    private String fileName;
    @Setter
    private String path;
    private BufferedWriter writer;

    public void openFile() throws IOException {
    	System.out.println("openFile() 실행 !!");

        File targetDir = new File(path);

	// path 디렉토리가 없으면 생성
        if(!targetDir.exists())
            targetDir.mkdir();

	// path + fileName 텍스트 파일이 없으면 생성
        File checkoutFile = new File(path, fileName + ".txt");
        if(!checkoutFile.exists())
            checkoutFile.createNewFile();

	// 파일 스트림을 열어 writer에 할당
        writer = new BufferedWriter(new OutputStreamWriter(new FileOutputStream(checkoutFile, true)));
    }

    public void checkout(ShoppingCart cart) throws IOException {
        writer.write(new Date() + "\t" + cart.getItems() + "\r\n");
        writer.flush();
    }

    public void closeFile() throws IOException {
    	System.out.println("closeFile() 실행 !!");

    	// 사용한 스트림을 닫음
        writer.close();
    }

}
이 클래스의 openFile() 메서드는 데이터를 써넣을 대상의 디렉토리와 파일이 있는지 확인하고 해당 파일을 열어서 writer 필드에 할당합니다. 그리고 closeFile() 메서드로 파일을 닫고 시스템 리소스를 반납합니다.
이 Cashier 클래스가 빈으로 등록될 때 openFile() 메서드를 실행하고, 폐기 직전에 closeFile() 메서드를 실행하도록 설정하겠습니다.
@Bean 사용 시
@Configuration
public class ShopConfiguration {

    @Bean(initMethod = "openFile", destroyMethod = "closeFile")
    public Cashier cashier() {
        String path = System.getProperty("java.io.tmpdir", "/cashier");
        Cashier cashier = new Cashier();
        cashier.setFileName("checkout");
        cashier.setPath(path);
        return cashier;
    }

}
@Bean 애너테이션에 initeMethod와 destroyMethod 속성에 각각 초기화할 메서드 이름과 폐기할 메서드 이름을 주어서 트리거하도록 설정하였습니다.
@Component 사용 시
@Component
public class Cashier {

    @Value("checkout")
    private String fileName;
    @Value("c:/Windows/Temp/cashier")
    private String path;
    private BufferedWriter writer;

    @PostConstruct
    public void openFile() throws IOException {
        System.out.println("openFile() 실행 !!");

        File targetDir = new File(path);
        if(!targetDir.exists())
            targetDir.mkdir();

        File checkoutFile = new File(path, fileName + ".txt");
        if(!checkoutFile.exists())
            checkoutFile.createNewFile();

        writer = new BufferedWriter(new OutputStreamWriter(new FileOutputStream(checkoutFile, true)));
    }

    public void checkout(ShoppingCart cart) throws IOException {
        writer.write(new Date() + "\t" + cart.getItems() + "\r\n");
        writer.flush();
    }

    @PreDestroy
    public void closeFile() throws IOException {
        System.out.println("closeFile() 실행 !!");

        writer.close();
    }

}
@Component 애너테이션 사용 시 @PostConstruct와 @PreDestroy 애너테이션을 초기화/폐기 메서드에 붙여주어 트리거하도록 설정하였습니다.
public class Main {

    public static void main(String[] args) {
        ApplicationContext context = new AnnotationConfigApplicationContext(ShopConfiguration.class);
    }
}

-- 결과 --
Creating shared instance of singleton bean 'cashier'
openFile() 실행 !!
Main 클래스에서 IoC 컨테이너를 올리면 cashier 빈이 등록된 직후에 openFile() 메서드가 실행되는 것을 확인할 수 있습니다.
@Lazy
스프링은 기본적으로 애플리케이션이 실행되는 동시에 모든 빈을 초기화 하는데요, 이를 Eager Initialization이라고 합니다. 하지만 환경에 따라 빈 초기화를 실제 사용 시점까지 늦춰야 할 경우(네크워크 접속, 파일 처리 등 무거운 작업)가 있는데요, 이 경우 @Lazy를 사용해서 Lazy Initialization으로 처리할 수 있습니다.
간단하게 Cashier 클래스에 @Lazy 애너테이션을 붙였는데요, 이를 테스트해보겠습니다.
@Lazy
@Component
public class Cashier {
	...
}
IoC 컨테이너가 실행되는 동시에 모든 빈을 초기화하였지만, @Lazy가 붙은 Cashier 클래스 같은 경우는 실제로 getBean() 메서드를 통해서 가져올 때 빈이 초기화되는 것을 확인할 수 있습니다.
public class Main {

    public static void main(String[] args) {
        ApplicationContext context = new AnnotationConfigApplicationContext(ShopConfiguration.class);

        System.out.println("Eager Initialization 완료!!");

        Cashier cashier = context.getBean(Cashier.class);
    }
}

-- 결과 --
Eager Initialization 완료!!

Creating shared instance of singleton bean 'cashier'
openFile() 실행 !!
@DependsOn
빈의 개수가 늘어나면 그만큼 빈의 초기화 횟수도 늘어나는데요, 빈은 여러 자바 구성 클래스에 분산되어 선언되기 때문에 서로 참조를 하다 보면 경합 조건이 발생할 수 있습니다. 예를 들면, B라는 빈이 F라는 빈에서 필요한데 B 빈이 초기화되기 전에 F 빈이 먼저 초기화되면 에러가 발생합니다.
이때, F 빈에 @DependsOn 애너테이션을 사용해서 '내가 B 빈에 의존하고 있으니 나보다 먼저 초기화해줘'라고 정의할 수 있습니다. 예시로 sequenceGenerator를 빈으로 등록하는 메서드에 @DependsOn("datePrefixGenerator")를 사용해서 해당 빈이 자신보다 먼저 초기화 되도록 설정하였습니다.
@Configuration
@Import(PrefixConfiguration.class)
public class SequenceGeneratorConfiguration {

    @Value("#{datePrefixGenerator}")
    private PrefixGenerator prefixGenerator;

    @Bean
    @DependsOn("datePrefixGenerator")
    public SequenceGenerator sequenceGenerator() {
        SequenceGenerator sequenceGenerator = new SequenceGenerator();
        sequenceGenerator.setPrefix("30");
        sequenceGenerator.setSuffix("A");
        sequenceGenerator.setInitial(100000);
        sequenceGenerator.setPrefixGenerator(prefixGenerator);

        return sequenceGenerator;
    }

}
2-9. 후처리기를 만들어 추가적인 작업 하기
빈 후처리기(bean post-processor)를 사용하면 *초기화 콜백 메서드 전후에 원하는 로직을 적용할 수 있습니다.
초기화 콜백 메서드 란?
빈이 초기화될 때 호출되는 메서드
앞에서 살펴본 openFile() 메서드 같이 @Bean의 initMethod 속성에 지정한 메서드나 @PostConstruct를 붙인 메서드빈 후처리기의 가장 주요한 특징은 IoC 컨테이너 내부의 모든 빈을 대상으로 한다는 점인데요, 이러한 특징을 이용해서 빈에 설정된 프로퍼티가 올바른지 체크하거나 어떤 기준에 따라 빈 프로퍼티를 변경할 수도 있고, 전체 빈 인스턴스를 대상으로 특정한 작업을 수행하는 용도로 사용합니다.
빈 후처리기 생성하기
빈 후처리기를 사용하려면 먼저 BeanPostProcessor 인터페이스를 구현해서 @Component로 빈 등록을 해주면 애플리케이션이 자동으로 감지해 빈 후처리기로 등록합니다.
스프링은 자신이 관리하는 모든 빈 인스턴스에 아래 두 개의 메서드를 적용하는데요, 각각 빈 초기화 전/후에 적용합니다. 해당 메서드는 반드시 bean을 반환해줘야 합니다.@Component public class AuditCheckBeanPostProcessor implements BeanPostProcessor { @Override public Object postProcessBeforeInitialization(Object bean, String beanName) throws BeansException { System.out.println("--- 빈 초기화 전 ---"); System.out.println("bean name: " + beanName); return bean; } @Override public Object postProcessAfterInitialization(Object bean, String beanName) throws BeansException { System.out.println("--- 빈 초기화 후 ---"); return bean; } }애플리케이션 컨텍스트를 인스턴스화 하면 모든 빈을 대상으로 빈 후처리기를 적용하는 것을 확인할 수 있고, Cashier 빈 같은 경우는 초기화 콜백 메서드 전후로 빈 후처리기가 적용되는 것을 확인할 수 있습니다.
public class Main {

    public static void main(String[] args) {
        ApplicationContext context = new AnnotationConfigApplicationContext(MessageConfiguration.class);
    }

}

-- 결과 --
...

Creating shared instance of singleton bean 'sequenceGeneratorConfiguration'
--- 빈 초기화 전 ---
bean name: sequenceGeneratorConfiguration
--- 빈 초기화 후 ---

Creating shared instance of singleton bean 'cashier'
--- 빈 초기화 전 ---
bean name: cashier
openFile() 실행 !!
--- 빈 초기화 후 ---

...
특정 타입의 빈에만 후처리기 적용하기
스프링은 기본적으로 모든 빈 인스턴스에 후처리기를 적용 하기 때문에 특정 타입의 빈에만 적용하기 위해서는 추가적인 작업을 해주어야 합니다. instanceof로 Product 타입으로 형변환이 가능한 빈만 후처리기의 로직을 적용할 수 있습니다.
@Component
public class ProductCheckBeanPostProcessor implements BeanPostProcessor {

    @Override
    public Object postProcessBeforeInitialization(Object bean, String beanName) throws BeansException {
        if (bean instanceof Product) {
            System.out.println("--- 빈 초기화 전 ---");
            System.out.println("productName = " + ((Product) bean).getName());
        }

        return bean;
    }

    @Override
    public Object postProcessAfterInitialization(Object bean, String beanName) throws BeansException {
        if (bean instanceof Product) {
            System.out.println("--- 빈 초기화 후 ---");
            System.out.println("productName = " + ((Product) bean).getName());
        }

        return bean;
    }

}
2-10. 팩토리(정적 메서드, 인스턴스 메서드, 스프링 FactoryBean)로 빈 생성하기
객체 생성 로직을 정적 메서드나 다른 객체 인스턴스의 메서드 내부로 캡슐화하면 클라이언트에서 객체 생성 로직을 알 필요 없이 메서드를 호출해서 빈으로 등록할 수 있는데요, 스프링이 제공하는 FactoryBean을 구현하거나 해당 인터페이스를 구현한 AbstractFactoryBean을 확장하면 또 다른 방식으로 객체를 빈으로 등록할 수 있습니다.
정적 팩토리 메서드로 빈 생성하기
ProductCreator 클래스는 정적 팩토리 메서드인 create를 구현 하였는데요, id를 매개변수로 받아서 id에 따라 각기 다른 객체를 생성하여 반환합니다. 정적 팩토리 메서드를 사용하는 클라이언트 입장에서는 내부 로직을 신경쓸 필요 없이 id만 넘겨주면 알아서 객체를 생성해주기 때문에 여러 상황에서 사용할 수 있습니다.
public class ProductCreator {

    public static Product create(String id) {
        if (id.equals("aaa"))
            return new Battery("AAA", 2.5);
        else if (id.equals("cdrw"))
            return new Disc("CD-RW", 1.5);
        else if(id.equals("dvdrw"))
            return new Disc("DVD-RW", 3.0);

        throw new IllegalArgumentException("Unknown product");
    }
}
자바 구성 클래스에서는 스프링과 관련 없이 자바 구문으로 정적 팩토리 메서드를 호출해서 빈을 생성합니다.
@Configuration
@ComponentScan("com.mins.springrecipes.shop")
public class ShopConfiguration {

    @Bean
    public Product aaa() {
        return ProductCreator.createProduct("aaa");
    }

    @Bean
    public Product cdrw() {
        return ProductCreator.createProduct("cdrw");
    }

    @Bean
    public Product dvdrw() {
        return ProductCreator.createProduct("dvdrw");
    }
}
스프링 팩토리 빈으로 빈 생성하기
다음은 AbstractFactoryBean을 확장하여 Product 객체에 할인율을 적용한 후에 빈으로 등록해주는 팩토리 빈입니다. getObjectType() 메서드는 스프링 빈으로 사용될 객체의 타입을 반환하고 createInstance() 메서드는 내부 생성 로직을 통해 생성된 객체를 반환합니다.
@Setter
public class DiscountFactoryBean extends AbstractFactoryBean<Product> {

    private Product product;
    private double discount;

    @Override
    public Class<?> getObjectType() {
        return product.getClass();
    }

    @Override
    protected Product createInstance() throws Exception {
        product.setPrice(product.getPrice() * (1 - discount));
        return product;
    }

}
자바 구성 클래스에서 @Bean 애너테이션이 적용된 메서드가 반환하는 객체가 AbstractBeanFactory 클래스를 확장한 경우, 스프링은 createInstance() 메서드가 반환하는 객체를 실제 빈 인스턴스로 사용합니다.
discountAAA는 DiscountFactoryBean 객체를 반환하는데요, 위 설명대로라면 이름이 "discountAAA" 빈은 "aaa" 빈에서 할인율 20%가 적용된 Product 인스턴스이어야 합니다.
@Configuration
@ComponentScan("com.mins.springrecipes.shop")
public class ShopConfiguration {

    @Bean
    public Product aaa() {
        return ProductCreator.createProduct("aaa");
    }

    @Bean
    public Product cdrw() {
        return ProductCreator.createProduct("cdrw");
    }

    @Bean // 20% 할인된 aaa를 빈으로 등록
    public DiscountFactoryBean discountAAA() {
        DiscountFactoryBean factory = new DiscountFactoryBean();
        factory.setProduct(ProductCreator.createProduct("aaa"));
        factory.setDiscount(0.2);
        return factory;
    }

    @Bean // 50% 할인된 cdrw를 빈으로 등록
    public DiscountFactoryBean discountCDRW() {
        DiscountFactoryBean factory = new DiscountFactoryBean();
        factory.setProduct(ProductCreator.createProduct("cdrw"));
        factory.setDiscount(0.5);
        return factory;
    }

}
Main에서 aaa와 discountAAA 빈을 찍어보면 DiscountFactoryBean 타입이 아닌 할인율이 적용된 Product 타입으로 등록된 것을 확인할 수 있습니다.
public class Main {

    public static void main(String[] args) {
        ApplicationContext context = new AnnotationConfigApplicationContext(ShopConfiguration.class);

        Product aaa = context.getBean("aaa", Product.class);
        System.out.println("aaa = " + aaa);

        Product discountAAA = context.getBean("discountAAA", Product.class);
        System.out.println("discountAAA = " + discountAAA);
    }

}

-- 결과 --
aaa = Product(name=AAA, price=2.5)
discountAAA = Product(name=AAA, price=2.0)
2-11. 스프링 환경 및 프로파일마다 다른 빈 로드하기
실제 운영되는 애플리케이션을 개발할 때는 보통 시나리오(예: 개발, 테스트, 운영)별로 properties 파일이나 자바 구성 클래스를 작성하는데요, 같은 빈이라도 시나리오에 따라 다르게 설정된 구현체를 넘겨줘야 하는 경우가 생깁니다.
스프링에서 제공하는 RestTemplate은 기본적으로 API 통신할 대상 서버가 SSL 인증서가 적용되어있는지를 검사하는데요, 테스트 서버에서는 통신하는 대상 서버가 SSL이 적용되어있지 않기 때문에 검사를 무시해야 하는 경우로 가정하겠습니다.
Restemplate를 빈으로 등록하는 자바 구성 클래스를 두 개로 분리하고 @Profile 애너테이션을 사용해서 애플리케이션 컨텍스트가 프로파일에 알맞은 자바 구성 클래스를 읽어서 실행하도록 하면됩니다.
다음은 @Profile 애너테이션에 dev, test 프로파일을 명시하여 개발, 테스트 환경일 때 SSL 검사를 무시하는 RestTemplate 객체를 빈으로 등록하는 자바 구성 클래스입니다.
@Configuration
@Profile({"dev", "test"})
public class RestTemplateDevConfig {

    @Bean
    public RestTemplate restTemplate(RestTemplateBuilder builder) throws NoSuchAlgorithmException, KeyManagementException {
	SSL 검사를 무시하는 RestTemplate 객체 생성
    }
}
반대로 운영 환경일 때는 SSL을 검사하는 RestTemplcate 객체를 생성해서 빈으로 등록합니다.
@Configuration
@Profile({"prod"})
public class RestTemplateConfig {

    @Bean
    public RestTemplate restTemplate(RestTemplateBuilder builder) {
        일반적인 RestTemplate 객체 생성
    }

}
자바 런타임 플래그로 로드할 프로파일을 명시하여 애플리케이션 컨텍스트가 인식할 수 있도록 합니다.
-Dspring.profiles.active=prod
기본 프로파일 지정하기
기본 프로파일은 스프링이 active profile을 하나도 찾지 못했을 때 적용할 프로파일인데요, active 대신 default를 사용하여 등록해줍니다.
-Dspring.profiles.default=dev
2-12. 빈에게 IoC 컨테이너 리소스 알려주기
컴포넌트가 IoC 컨테이너와 직접적인 의존 관계를 갖도록 설계하는 것은 바람직하지 않지만 때로는 빈에서 컨테이너의 리소스를 인지해야 하는 경우도 있는데요, 이 경우 Aware(인지) 인터페이스를 구현합니다.
Aware 인터페이스 대상 리소스 타입 BeanNameAware Ioc 컨테이너에 구성한 인스턴스의 빈 이름 BeanFactoryAware 현재 빈 팩토리. 컨테이너 서비스를 호출 ApplicationContextAware 현재 애플리케이션 컨텍스트. 컨텍스트 서비스를 호출 MessageSourceAware 메시지 소스. 텍스트 메시지를 해석 ApplicationEventPublisherAware 애플리케이션 이벤트 발행기. 애플리케이션 이벤트를 발행하느 데 쓰임 ResourceLoaderAware 리소스 로더. 외부 리소스를 로드 EnvironmentAware ApplicationContext 인터페이스에 묶인 Environment 인스턴스 스프링은 Aware 인터페이스를 구현한 빈을 감지해서 세터 메서드로 대상 리소스를 주입합니다.
ApplicationContextAware
@Component
public class Cashier implements ApplicationContextAware {

    private ApplicationContext context;

    @Override
    public void setApplicationContext(ApplicationContext context) throws BeansException {
        this.context = context;
    }

}
BeanNameAware
@Component
public class Cashier implements BeanNameAware {

    private String beanName;

    @Override
    public void setBeanName(String name) {
        this.beanName = name;
    }
}
Aware 인터페이스를 구현한 클래스는 스프링에 종속적이기 때문에 IoC 컨테이너 외부에서는 제대로 동작하지 않기 때문에 주의해야 합니다.
최신 버전의 스프링에서는 Aware를 구현할 필요 없이 DI를 통해서 ApplicationContext와 같은 리소스를 사용할 수 있습니다.
@Component
public class ShoppingCart {
    private final ApplicationContext context;
    private final MessageSource messageSource;

    public ShoppingCart(ApplicationContext context, MessageSource messageSource) {
        this.context = context;
        this.messageSource = messageSource;
    }

    @PostConstruct
    public void print() {
        System.out.println("context = " + context);
        System.out.println("messageSource = " + messageSource);
    }

}

-- 결과 --
context = org.springframework.context.annotation.AnnotationConfigApplicationContext@1edf1c96, started on Thu Mar 04 14:43:30 KST 2021
messageSource = org.springframework.context.support.ReloadableResourceBundleMessageSource: basenames=[classpath:messages]
끝.
반응형'Spring' 카테고리의 다른 글
[스프링 5 레시피] 5장: 스프링 MVC 비동기 처리 (0) 2021.04.07 [스프링 5 레시피] 3장: 스프링 MVC (0) 2021.03.10 [스프링 5 레시피] 2장: 스프링 코어 (2-1 ~ 2-6) (4) 2021.02.26 [JPA] JpaRepository save() 메서드 주의 사항 (1) 2021.02.17 [JPA] N+1 문제 해결하기 (0) 2020.12.25